Pazarlamacının Araç Seti: Küresel Etki için Videolara Altyazı Ekleme
İçinde Ne Var
Bir videoya altyazı eklenmesi, videonun %30 oranında anlaşılmasını, dikkat çekmesini ve hafızada tutulmasını sağlar. Dahası, birçok izleyici videoları altyazılı izlemeyi tercih ediyor. Ayrıca, sosyal medya platformları videoları genellikle ses olmadan otomatik olarak oynatır. Bu da altyazıları izleyicilerin dikkatini çekmek için önemli hale getiriyor. Peki alt yazı nasıl etkili bir şekilde, maliyet tasarrufu sağlayacak ve sonuç getirecek şekilde uygulanır? İçerik oluşturucu alt yazı kullanımı hakkında ne bilmeli ve performansını nasıl artırabilir? Makaleyi okuyun ve bir videoya nasıl altyazı ekleneceğine dair tüm yanıtları alın. Bonus olarak, makalenin sonunda Rask AI ekibinin profesyonel ipuçlarını ve püf noktalarını bulacaksınız. Rask AI, içerik oluşturucuların küresel pazarlara ulaşmasına yardımcı olan önemli bir güncelleme aldı. Artık çevrimiçi altyazı ekleyebiliyor ve Pro ve Business planlarında bulunan 130 dilde çeviri ve metin yeniden yazma aracına erişebiliyorlar. Ayrıca, içerik oluşturucular seslendirmeyi desteklemek için veya video altyazısız başladıysa SRT dosyalarını ayrı olarak yükleyebilirler.
Daha fazlasını öğrenmek ister misiniz? Hadi detaylara dalalım!
Video Pazarlama Neden Önemlidir?
Video pazarlama, işletmeler için yüce bir araç haline geldi. Sadece rakamlara bir göz atın. Tüketicilerin %91'i markalardan daha fazla online video içeriği görmek istiyor. Pazarlamacıların %96'sı videoyu pazarlama stratejilerinin önemli bir parçası olarak görüyor. Pazarlamacıların %93 'ü sosyal medya videoları sayesinde yeni bir müşteri kazandıklarını söylüyor.
Bu neden oluyor? Videolar duyguları uyandırır ve mesajları etkili bir şekilde iletir. Bu, işletmelerin ürün veya hizmetlerini sergilemeleri için mükemmel bir araçtır. Ayrıca, video pazarlama hikaye anlatımı ve marka oluşturma imkanı sunar ve müşterilerle güçlü bir bağ kurar.
En büyük etki kısa formlu video içeriğinin yükselişiyle mümkün: Makaralar, Kısalar, Hikayeler vb. Bu tür videolar modern tüketicinin sınırlı dikkat süresine hizmet eder, bilgileri hızlı bir şekilde sunar ve izleyicilerin dikkatini oynat tuşuna bastıkları andan itibaren anında çeker.
Ayrıca, kısa biçimli videolar son derece paylaşılabilirdir. Son olarak, kısa biçimli videolar son derece uyarlanabilir ve çok yönlüdür. Farklı sosyal medya platformlarında kolayca yeniden kullanılabilirler.
Sonuç olarak TikTok, Instagram ve YouTube videoları gibi sosyal medya kanalları bu tür içerikleri tüketmeye hevesli geniş bir kitle yarattı. İşletmeler bu kanallardan ve videolardan faydalanarak devasa bir kullanıcı tabanına dahil olabilir ve potansiyel müşterilere ulaşabilir.
İçerik Oluşturucular Altyazı Kullanımından Nasıl Yararlanabilir?
İşte size nasıl altyazı ekleyeceğiniz ve oluşturduğunuz içeriği nasıl geliştireceğiniz hakkında bazı bilgiler.
Altyazılar dil öğrenenler için bir araç sunar. Altyazı sayesinde, aynı anda hem okuyup hem dinleyebilir, kelime dağarcıklarını, dilbilgilerini ve telaffuzlarını geliştirebilirler. Ayrıca, altyazılar içeriği işitme engelli bireyler için erişilebilir ve daha kapsayıcı hale getirir.
Altyazılar, arama motorlarının indekslediği metin tabanlı içerik sağlayarak SEO'nun geliştirilmesine katkıda bulunur. Bu, videoların keşfedilebilirliğini artırır, arama motoru sonuç sayfalarında daha üst sıralarda yer alır ve organik trafiği artırır.
Altyazılı video, altyazısız videoya göre daha ilgi çekicidir. Mesele şu ki, sosyal medya platformları videoları ses olmadan otomatik oynatıyor. İçerik oluşturucu, altyazı ekleyerek beslemelerinde gezinen izleyicilerin dikkatini çeker. Bu etki bir YouTube videosu için %40'a kadar çık abilir.
Altyazı eklerseniz, videonuzu daha geniş bir kitleye açmış olursunuz. İçerik oluşturucunun mesajının işitme engelli veya dil engeli olan bireylere ulaşmasını sağlarlar.
Altyazı Dosyaları, Kapalı Altyazılar ve Açık Altyazılar Nasıl Farklılaşır?
Bazen içerik oluşturucuların bu üç terimle kafası karışıyor. Bu konuya açıklık getirelim.
Konuşulan kelimelerin metinsel temsilini sağlama ortak hedefini paylaşsalar da, görüntüleme ve erişilebilirlik seçenekleri açısından farklılık gösterirler.
Altyazılar öncelikle diyalogları çevirme veya videoda konuşulan dili anlamayan izleyiciler için çeviri sağlama amacına hizmet eder. Ekranın altında, genellikle farklı bir dilde ayrı metin satırları olarak görünürler. Altyazılar, izleyicilerin konuşmayı takip etmelerini ve içeriği tercih ettikleri dilde anlamalarını sağlar.
Diğer yandan altyazılar, bir videodaki sesin daha kapsamlı bir metinsel temsilini sunar. Yalnızca diyalogları içermekle kalmaz, aynı zamanda ses efektleri ve ortam sesleri gibi diğer ses unsurlarını da aktarırlar. Altyazılar izleyici tarafından açılıp kapatılabilir ve esnek bir erişilebilirlik seçeneği sunar. Altyazılar transkripsiyon, senkronizasyon, formatlama, kodlama ve kalite güvencesi yoluyla oluşturulur. Bu özellik özellikle işitme engelli veya işitme güçlüğü çeken bireyler ve videoları ses olmadan izlemeyi tercih edenler için değerlidir.
Kapalı açıklamalı alt yazıların aksine, açık açıklamalı alt yazılar kalıcı olarak videonun içine gömülüdür. İzleyici tarafından devre dışı bırakılamaz veya kapatılamazlar. Açık altyazılar her zaman görünürdür, bu da onları izleyicinin tercihine veya platformun özelliklerine bakılmaksızın altyazıların varlığının gerekli olduğu durumlar için ideal kılar. Örneğin, açık altyazılar gürültülü ortamlarda veya video altyazı işlevini desteklemeyen platformlarda izlenirken kullanışlıdır.
Son olarak, altyazılar öncelikle çeviriler için kullanılır, altyazılar izleyici tarafından özelleştirilebilen isteğe bağlı erişilebilirlik sağlar. Açık altyazılar, sürekli görüntülenmeleriyle, daha iyi anlama için altyazıların her zaman kullanılabilir olmasını sağlar. Hangi seçeneğin kullanılacağının seçimi hedef kitle, erişilebilirlik gereksinimleri ve videonun izleneceği platform gibi faktörlere bağlıdır.
Kısa Formlu İçerik Nasıl Çevrilir Video
Son olarak, altyazı dünyasına dalmaya hazırsınız. Bu süreçteki ilk adım, orijinal videoyu yazıya dökmek ve ardından ihtiyacınız olan dile çevirmektir.
Burada iki seçeneğiniz var, manuel olarak yazıya dökmek veya AI transkripsiyon hizmetlerini kullanmak. Google Translate seçeneğini kullanmanızı tavsiye etmiyorum, birçok sıkıntıya yol açabilir.
Ardından, içerik bir markaya aitse, markanın benzersiz sesini ve kimliğini korumanız gerekir. Altyazıların çevirisini markanın değerleri, tonu ve tarzıyla uyumlu olacak şekilde uyarlayın.
Metnin çevirisini yaptıktan sonra, bir sonraki adım altyazı dosyasını videonun ritmine uygun daha kısa, okunabilir cümlelere ayırmaktır. Ardından, her cümleyi videonun uygun anına göre ayarlayın. Dikkat, sabır ve zaman gerektirir.
Bunu manuel olarak yapmaktan daha hızlı yapmak istiyorsanız, düzenleme araçlarını veya bir AI video çevirmeni kullanın. Sadece videoyu yükleyerek başlamalısınız. Ardından orijinal video ile aynı dili ve çevirinin gerekli olduğu son dili seçin. Çevir'e tıklayın ve videonuz kolayca çevrilecektir.
Bundan sonra, tüm düzenlemeleri ve çevirinin teknik olarak orijinal resimle uyumlu olup olmadığını iki kez kontrol edin.
Diğer Dillerde Altyazı Çevirisi ile Küresel Bir Kitleye Nasıl Ulaşılır?
Videonuz çevrildi ve platforma yüklendi. Ancak, düşük performans gösteriyor gibi görünüyor. Bunun olası bir nedeni, hedef kitlenizin çok dar olması olabilir. Performansını artırmak ve küresel bir kitleye ulaşmak için videoyu birden fazla dile çevirmeyi düşünebilirsiniz. İşte Rask AI ekibinden çok dilli çeviriyi etkili bir şekilde uygulamanıza yardımcı olacak bazı uzman ipuçları.
- Hedef kitlenizi belirleyin. İçeriğiniz için potansiyel taşıyan bölgeleri ve dilleri anlamak için araştırma yapın. Dil yaygınlığını, hedef demografik özellikleri ve pazar fırsatlarını göz önünde bulundurun.
- Altyazılarınızı hedef kitleniz için en yüksek erişim ve etkileşim potansiyeline sahip dillere çevirerek başlayın. Altyazıları yalnızca içeriğinizi yerelleştirdikten sonra, en umut verici büyüme beklentilerine sahip olabileceğiniz belirli ülkelere uyarlamak için ekleyin.
- Alt yazıların ve altyazıların doğru ve kültürel açıdan uygun çevirilerini sağlamak için profesyonel çeviri hizmetleriyle çalışmayı veya ana dili İngilizce olan kişilerle işbirliği yapmayı düşünün. Onların uzmanlığı içeriğinizin bütünlüğünü korumanıza yardımcı olacaktır, bu nedenle altyazıları videoya yalnızca kontrol ettikten sonra ekleyin.
- Bazı dillerin kaynak dile kıyasla daha fazla karakter gerektirebileceğini veya farklı cümle yapılarına sahip olabileceğini unutmayın. Okunabilirliği, senkronizasyonu ve görsel çekiciliği korumak için altyazı eklemek önemlidir. Altyazı zamanlamalarına, satır sonlarına ve altyazıların sunumuna dikkat edin.
- Altyazılarınızı çevirirken ve uyarlarken kültürel nüansları göz önünde bulundurun. Her dilde hedef kitleye hitap edecek şekilde ayarlanmış deyimler, argo ve mizah içeren altyazılar ekleyin. Örneğin, yerel Meksika malzemelerinin kullanıldığı geleneksel tarifleri "kıyılmış sarımsak" yerine "lezzet dolu minik vampirler" olarak çevirmeyin. Bu, videoların izleyiciler için daha ilişkilendirilebilir ve ilgi çekici bir şekilde oluşturulmasına yardımcı olur. İzleyiciler, kültürel geçmişlerine gösterdiğiniz anlayış ve saygıyı takdir edeceklerdir.
- Jargon ve kısaltmalara hayır deyin. Orijinal dile aşina olmayan izleyiciler için kafa karıştırıcı olabilirler. Teknik terimleri değiştirin ve altyazıları daha evrensel olarak anlaşılan eşdeğerleriyle ekleyin.
- Ana dili İngilizce olanlardan veya hedef kitle üyelerinden geri bildirim alın. Bu, çevirilerin kalitesini ve etkinliğini ölçmenize ve daha fazla iyileştirme gerektirebilecek alanları belirlemenize yardımcı olacaktır.
Ücretli bir reklam seçeneği veya yaratıcı bir yaklaşım, videonuzla daha geniş bir kitleye ulaşmanıza yardımcı olacaktır.
Ses ve Altyazı Birlikte Nasıl Kullanılır?
Bir videonun erişilebilirliğini artırmanın bir başka yolu da videolarınızda hem sesleri kullanmak hem de altyazıları birlikte eklemektir. Daha önce de belirtildiği gibi, bu sadece işitme engelli veya işitme güçlüğü çekenlere fayda sağlamakla kalmaz, aynı zamanda videoları ses olmadan izlemeyi tercih edenler için de bir seçenek sunar.
Her şeyden önce, konuşulan içeriği tam olarak yazıya dökmeniz gerekir. Alt yazı ve altyazı metninin konuşulan kelimelerin özünü ve anlamını yakalayıp yakalamadığını kontrol edin. Ses tonuna, duygulara ve duraklamalara dikkat edin.
Transkripsiyon tamamlandığında, altyazı dosyasını konuşma ile senkronize edin. Sonucu izleyin ve zamanlamanın sesle mükemmel şekilde hizalandığından emin olun; aksi takdirde izleyicilerin kafası karışabilir veya dikkatleri dağılabilir. Bu işlemi kolaylaştırmak için Premiere Pro gibi bir altyazı düzenleyici veya yazılım kullanın. Kolayca altyazı eklemenize yardımcı olacaktır.
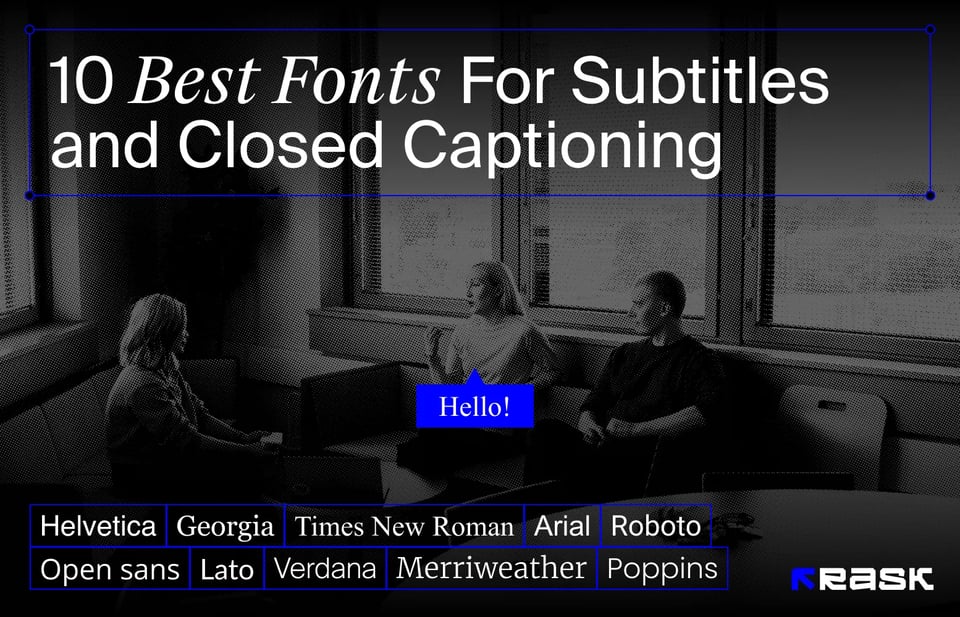
Bundan sonra, altyazılarınız için net bir yazı tipi seçin. Arial, Helvetica, Roboto veya Open Sans'ı öneriyoruz. Genellikle sans-seriftirler ve küçük boyutlarda bile okunmalarını kolaylaştıran basit bir tasarıma sahiptirler.
Görsel öğeleri engellemeden veya dikkati ana içerikten uzaklaştırmadan altyazı eklediğinizden emin olun. Alt yazıların ve altyazıların okunabilirliği ile genel görüntüleme deneyimini en az şekilde bozması arasında bir denge kurmayı hedefleyin.
Son olarak, videonuzun stiline ve markasına bağlı olarak, genel görsel estetiği tamamlayan tasarım öğelerini altyazılara yerleştirin. Bunlar renkler, yazı tipi stilleri veya animasyonlar olabilir. Bu tür ayarlamalarla altyazı eklediğinizde, altyazıların görsel çekiciliğini artırdığınızı göreceksiniz.
Otomatik YouTube Altyazıları Diğerlerinden Daha mı İyi?
İlk bakışta, YouTube videoları otomatik senkronizasyon yoluyla ücretsiz altyazı sağlarken neden harici hizmetlerle altyazı eklediğinizi merak edebilirsiniz. Ancak YouTube altyazılarının doğruluğu beklediğiniz kadar güvenilir olmayabilir. İşte hassasiyetlerini etkileyebilecek bazı faktörler.
- Bozuk veya gürültülü ses, kelimelerin yanlış yorumlanmasına veya tanınmamasına neden olabilir. Ses seviyesinin düşük olduğu durumlarda, ücretsiz yapay zeka sesi tam olarak yakalamakta zorlanabilir.
- Ayrıca, YouTube videosunun konuşma tanıma teknolojisi aksanları veya lehçeleri tanımada zorluklarla karşılaşabilir. Bu nedenle, alt yazıdaki yanlışlıklarla birlikte altyazı ekleyeceksiniz.
- Ayrıca, konuşma tanıma teknolojisi bazen belirli sesleri insan konuşması sanabilir. Sonuç olarak, yanlış altyazı görürsünüz.
Bu nedenle otomatik YouTube video altyazıları hala manuel inceleme ve düzenleme gerektiriyor.
YouTube Videolarındaki Otomatik Altyazılar Nasıl İncelenir?
Otomatik altyazı sistemine tamamen güveniyorsunuz, ancak videoya uygun olup olmadıklarından yeterince emin değilsiniz. Kontrol etmek için aşağıdaki adımları uygulayın.
- YouTube hesabınızda oturum açın ve YouTube Studio'ya girin.
- "İçerik" sekmesi altındaki "Altyazılar" bölümüne gidin.
- İncelemek istediğiniz çevrimiçi videoyu seçin ve altyazıların dilini seçin. Kendinizi altyazı düzenleyici sayfasında bulacaksınız. Burada, YouTube tarafından oluşturulan otomatik altyazıları görüntüleyebilirsiniz.
- Videoyu oynatın ve altyazılarla birlikte takip edin. Altyazıları ekleyin ve yazım hataları, yanlışlıklar veya eksik metin olup olmadığını kontrol edin. Herhangi bir hatayla karşılaşırsanız, düzenleyicideki altyazı kutusuna tıklayın ve düzenlemeleri yapın. YouTube videonuz için gerektiği gibi metin ve zamanlama ekleyebilirsiniz. Bir altyazı tamamen yanlışsa, kutunun tamamını silebilirsiniz.
Video boyunca otomatik altyazı dosyasını incelemeye ve düzenlemeye devam edin. İşiniz bittiğinde değişikliklerinizi kaydet'i seçin ve önizleme işlevini kullanın. Altyazıların doğru ve senkronize olup olmadığını kontrol edin. Daha fazla ayarlama gerekiyorsa, altyazı düzenleyicisine geri dönün.
Video düzenlemesinden memnun olduğunuzda, altyazı ekleyin, yayınlayın ve izleyiciler bunu görecektir.
YouTube Videolarına Hazırlanmış Altyazılar Nasıl Eklenir?
YouTube'a otomatik altyazılar yerine altyazı ekleyebilirsiniz.
- YouTube hesabınızı ve YouTube Studio'yu girin.
- Sol tarafta, "İçerik" bölümünün altında "Altyazılar "ı bulun ve tıklayın.
- Ardından, iyileştirmek istediğiniz videoyu seçin.
- "Dil Ekle "ye tıklayın ve ihtiyacınız olan dili seçin
Şimdi, üç seçeneğiniz var:
- Altyazı oluşturmayı ve sıfırdan altyazı eklemeyi tercih ediyorsanız, "Yeni altyazı oluştur" düğmesine tıklayın. Bu, YouTube altyazı düzenleyicisini açacak ve altyazılar sekmesinde metni manuel olarak yazacaktır.
- Fikrinizi değiştirdiyseniz, "Otomatik senkronize et" düğmesini kullanın. Bunların doğru olmayabileceğini unutmayın, bu nedenle bunları manuel olarak gözden geçirmeniz ve düzenlemeniz gerekecektir.
- Bazı değişiklikler olduysa ve altyazıları manuel olarak oluşturmak yerine zaten var olan bir altyazı dosyasını kullanmayı tercih ediyorsanız, "Dosya yükle" düğmesini seçin ve uygun dosyayı seçin. YouTube videoları .srt, .sbv ve .sub gibi çeşitli altyazı dosyası formatlarını destekler.
Tercih ettiğiniz yöntemi seçtikten sonra, işlemi tamamlamak için talimatları izleyin. Değişiklikleri kaydettiğinizden emin olun
- YouTube videolarınıza altyazı ekledikten sonra, "Önizleme" düğmesine tıklayarak önizleme yapın. Altyazıların doğruluğunu ve zamanlamasını izleyin.
- Altyazılardan veya açıklamalı altyazılardan memnun kaldığınızda, "Yayınla" seçeneğine tıklayın. Ve YouTube videonuz çevrimiçi olarak görünecektir.
Altyazı ve resim yazısı oluşturma stratejinizi istediğiniz zaman değiştirebileceğinizi, manuel el yazısından altyazılar sekmesindeki otomatik seçeneğe geçebileceğinizi unutmayın. YouTube video özellikleri, gerektiğinde bu seçenekler arasında geçiş yapılmasına olanak tanır.
Çevrimdışı Videolardan Altyazı Nasıl Çıkarılır?
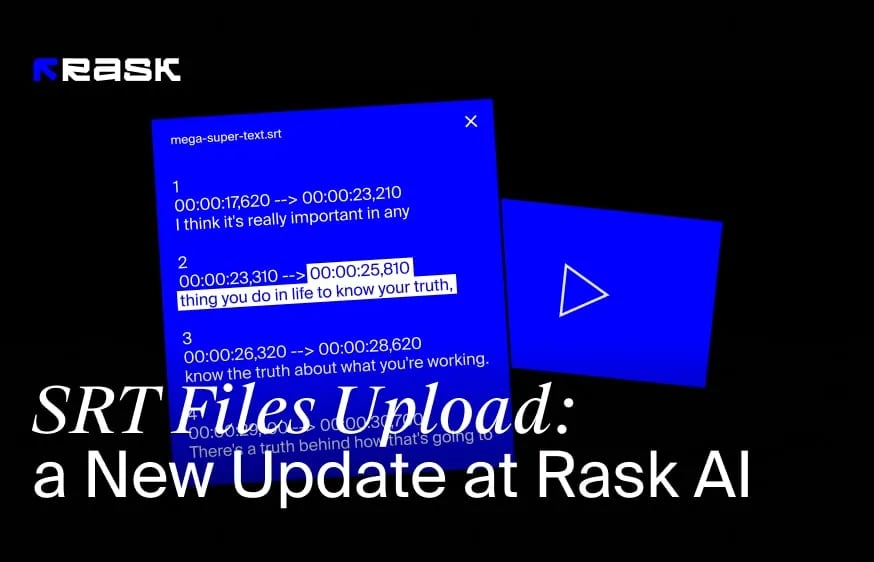
Bu, video oluşturucuların karşılaştığı bir başka yaygın zorluktur. Bunu çözmek için SRT veya SubRip Altyazı dosyalarına ihtiyacınız vardır. Bir video veya ses dosyasının yanında bir altyazı dosyası görüntülemek için gereken temel zamanlama ve metin bilgilerini içerirler. Birçok video platformu otomatik altyazı oluşturma olanağı sunsa da, SRT dosyasına sahip olmanın çeşitli nedenlerle gerekli olduğu durumlar vardır:
- Video içeriğinizi farklı dillere çevirmeyi planlıyorsanız, ayrı bir SRT dosyasına sahip olmak, her dil için altyazıların yönetilmesini ve özelleştirilmesini kolaylaştırır.
- Farklı bir SRT dosyası ile altyazıların tasarımı üzerinde tam kontrole sahip olabilirsiniz. Bu, altyazı eklemenize ve bunları videonun markasına veya görünümüne uyacak şekilde özelleştirmenize olanak tanır.
- Bazı video platformları veya oynatıcılar SRT dosyasının belirli formatlarda veya yapılarda olmasını gerektirebilir. Ayrı bir SRT dosyanız olduğunda, videonuzu farklı platformlarla uyumlu hale getirebilirsiniz.
Peki, bir SRT dosyasını nasıl elde edebilirsiniz? Bunları doğrudan sabit sürücünüzde kayıtlı olan bir videodan çıkarabilirsiniz. SRT dosyasını indirmek istediğiniz videoyu bularak başlayın. Altyazılara erişmek ve değiştirmek için gerekli izinlere veya haklara sahip olduğunuzdan emin olun.
Ardından güvenilir bir SRT Çıkarma Aracı bulun. Buna bağlı olarak, video dosyasını yüklemeniz veya URL'sini sağlamanız gerekecektir. SRT otomatik çıkarma işlemini başlatmak için düzenleme araçları tarafından sağlanan talimatları izleyin.
Çıkarma işlemi tamamlandığında, araç SRT dosyasını oluşturacaktır. Dosyayı bilgisayarınıza veya tercih ettiğiniz depolama konumuna indirin. Düzenleme kolaylığı için dosyanın uygun şekilde etiketlendiğinden emin olun.
Bundan sonra tek yapabileceğiniz bunları değiştirerek video barındırma platformlarına ve sosyal medya kanallarına altyazı eklemek veya SRT dosyalarını web sitelerine yerleştirmektir.
Rask AI ile Altyazı Nasıl Eklenir?
Rask Yapay zeka, videoyu gerçek zamanlı olarak yazıya dökebilir, sesi metne dönüştürebilir, metinden konuşmaya oluşturabilir ve videolara altyazı ekleyebilir. Çözüm, 130 dili destekleyen, çoklu konuşmacıları ve zaman damgası kontrolünü destekleyen AI teknolojisine dayanmaktadır.
Bu nedenle, altyazı eklemek için videonuzu Rask AI adresine yükleyerek başlayın.
Bundan sonra, kaydınızın tam transkriptini alabilirsiniz. Transkripti indirmek için "Kayıt dosyaları" bölümüne gidin ve transkript önizlemesini bulun. Transkriptin yanındaki "İndir" seçeneğine tıklayın. Ya da "İndir "in yanındaki üç noktayı seçip tam bir önizleme için "Transkripti görüntüle "yi seçebilirsiniz.
Ardından, SRT formatını seçme seçeneğiniz vardır. Transkript dosyasını indirdiğinizde, herhangi bir tutarsızlık, hata veya yazım hatası olup olmadığını inceleyin.
Son olarak, Rask AI ile video dosyasına geri dönün.
YouTube videonuza altyazı eklemek istiyorsanız, YouTube Studio'ya gidin. Sol menüden "Altyazılar "ı seçin ve indirdiğiniz SRT dosyasını yükleyin. Yanlışlıklar ve hatalar için sonucu izleyin.
İpuçları ve Püf Noktaları Altyazı Ekleme
Daha önce de söylendiği gibi, içerik oluşturucular yazı tipi seçimine, boyutuna, rengine, konumuna, sesle senkronizasyonuna ve hatalar için düzeltme okumasına dikkat etmelidir. İşte video düzenleme ve altyazıların nasıl daha iyi performans göstereceği konusunda uzman ipuçları ve püf noktaları.
- Altyazıların çeşitli ekran boyutlarında ve çözünürlüklerde okunabilecek kadar büyük olduğundan emin olun. Altyazılar için önerilen yazı tipi boyutu yönergelerini dikkate alarak düzenleyin.
- Altyazı dosyanızda, okunabilirliği artırmak için video arka planına karşı kontrast renkler kullanın. Örneğin, parlak beyaz arka plana sahip bir videoya altyazı eklerken siyah veya koyu mavi altyazıları tercih edin.
- Altyazıları ekleyin ve görsel öğeleri engellemeyecek veya ana içeriğin dikkatini dağıtmayacak bir konuma yerleştirin. Geleneksel olarak, ekranın alt orta veya alt alt üçte birlik kısmına yerleştirilirler.
- İzleyicilerin altyazıların her bir parçasını okuması için yeterli süre tanıyın. Video düzenleme sırasında, her bir altyazının süresini metin miktarına ve konuşulan diyaloğun temposuna göre ayarlayın. Aşırı kalabalıktan veya hızlı geçişlerden kaçınmak için farklı diller için konuşmadaki doğal duraklamaları dikkate alın.
- Video düzenleme sırasında mesajınızın netliğini ve anlaşılırlığını sağlamak için uygun noktalama işaretlerini kullanmanız ve yazınızda okunabilirliği korumanız çok önemlidir.
- Stilinizi, biçimlendirmenizi ve büyük harf kullanımınızı tutarlı tuttuğunuzdan emin olun. Aksi takdirde, otomatik olarak oluşturulan tutarsızlıklar dikkat dağıtıcı olabilir ve genel kaliteyi düşürebilir.
- Altyazıları ekleyin ve PC'nin yanı sıra farklı platformlarda ve mobil cihazlarda test edin. Bu, ayarlanması gerekebilecek biçimlendirme veya zamanlama sorunlarının belirlenmesine yardımcı olacaktır.
Bu önerileri izleyin ve video dosyanız için profesyonel altyazılara sahip olun.
Sonuç
Video içeriklerine altyazı eklenmesi, modern pazarlamacının araç setinde önemli bir anahtar haline geldi ve küresel etki yaratarak daha geniş bir kitlenin ilgisini çekmeyi sağladı. Altyazılar, farklı dillerden ve kültürlerden insanların içeriğinizi daha iyi anlamasına yardımcı olur. Ayrıca videoları görsel olarak daha çekici hale getirir ve izleme deneyimini geliştirir.
Altyazı eklemenin iki yolu vardır: manuel olarak veya otomasyon araçlarını kullanarak. Altyazı eklerken her yaklaşımın artıları ve eksileri vardır. İçerik oluşturucunun zamanı yoksa veya dili ana dili olarak konuşmuyorsa, ikinci seçenek daha uygun olabilir. Seçilen yöntem ne olursa olsun, altyazı eklemek video performansını artırmada önemli bir adımdır.
Sıkça Sorulan Sorular
Güvenilir bir otomatik altyazı oluşturucu bulun ve video dosyanızı platforma yükleyin. Süreci başlatan araç, videonuzdaki sesi analiz edecek ve konuşulan içeriğe göre otomatik olarak bir metin transkripti oluşturacaktır. Bu, videonun uzunluğuna bağlı olarak genellikle birkaç dakika sürer. Araç altyazıları oluşturduktan sonra doğruluklarını gözden geçirin. Otomatik transkripsiyon bazen, özellikle arka plan gürültüsü, aksanlar veya karmaşık terminolojide hatalar veya yanlışlıklar üretebilir. Video düzenleme sırasında, altyazıların doğru ve tutarlı olduğundan emin olmak için hataları düzeltin.
Altyazılardan memnun kaldığınızda, oluşturulan altyazı dosyasını SRT veya VTT gibi uygun formatta indirin.
Son olarak, altyazı dosyasını içe aktarmak ve videonuzun üzerine yerleştirmek için video düzenleme yazılımını kullanabilirsiniz. Yazılım, video içeriğinizle hizalamak için altyazıların zamanlaması, biçimlendirmesi ve konumlandırması ile altyazı eklemenize olanak tanır.
Dosyayı video ile birlikte yükleyin. SRT ve MP4 dosyalarınızı birleştirin. Videonuz yüklendikten sonra, altyazıları manuel olarak ekleme veya bir SRT dosyası aracılığıyla ekleme seçeneği sunulur. Son olarak, birleştirilmiş klibinizi indirin ve hatalar için izleyin.

.jpg)
.webp)

![8 İçerik Oluşturucular için En İyi Video Çevirmen Uygulaması [of 2024]](https://rask.ai/cdn-cgi/image/width=960,format=auto,fit=scale-down/https://cdn.prod.website-files.com/63d41bc99674c403e4a7cef7/6668a3dcd3175bd1d1c73c81_Best%20video%20translator%20apps%20cover.webp)
![Video Yerelleştirme için En İyi Yapay Zeka Dublaj Yazılımı [of 2024]](https://rask.ai/cdn-cgi/image/width=960,format=auto,fit=scale-down/https://cdn.prod.website-files.com/63d41bc99674c403e4a7cef7/66685014f68137eb05c89c16_Cover.webp)


.webp)

.jpg)
